
Power Station
Sci-fi movie inspired digital render
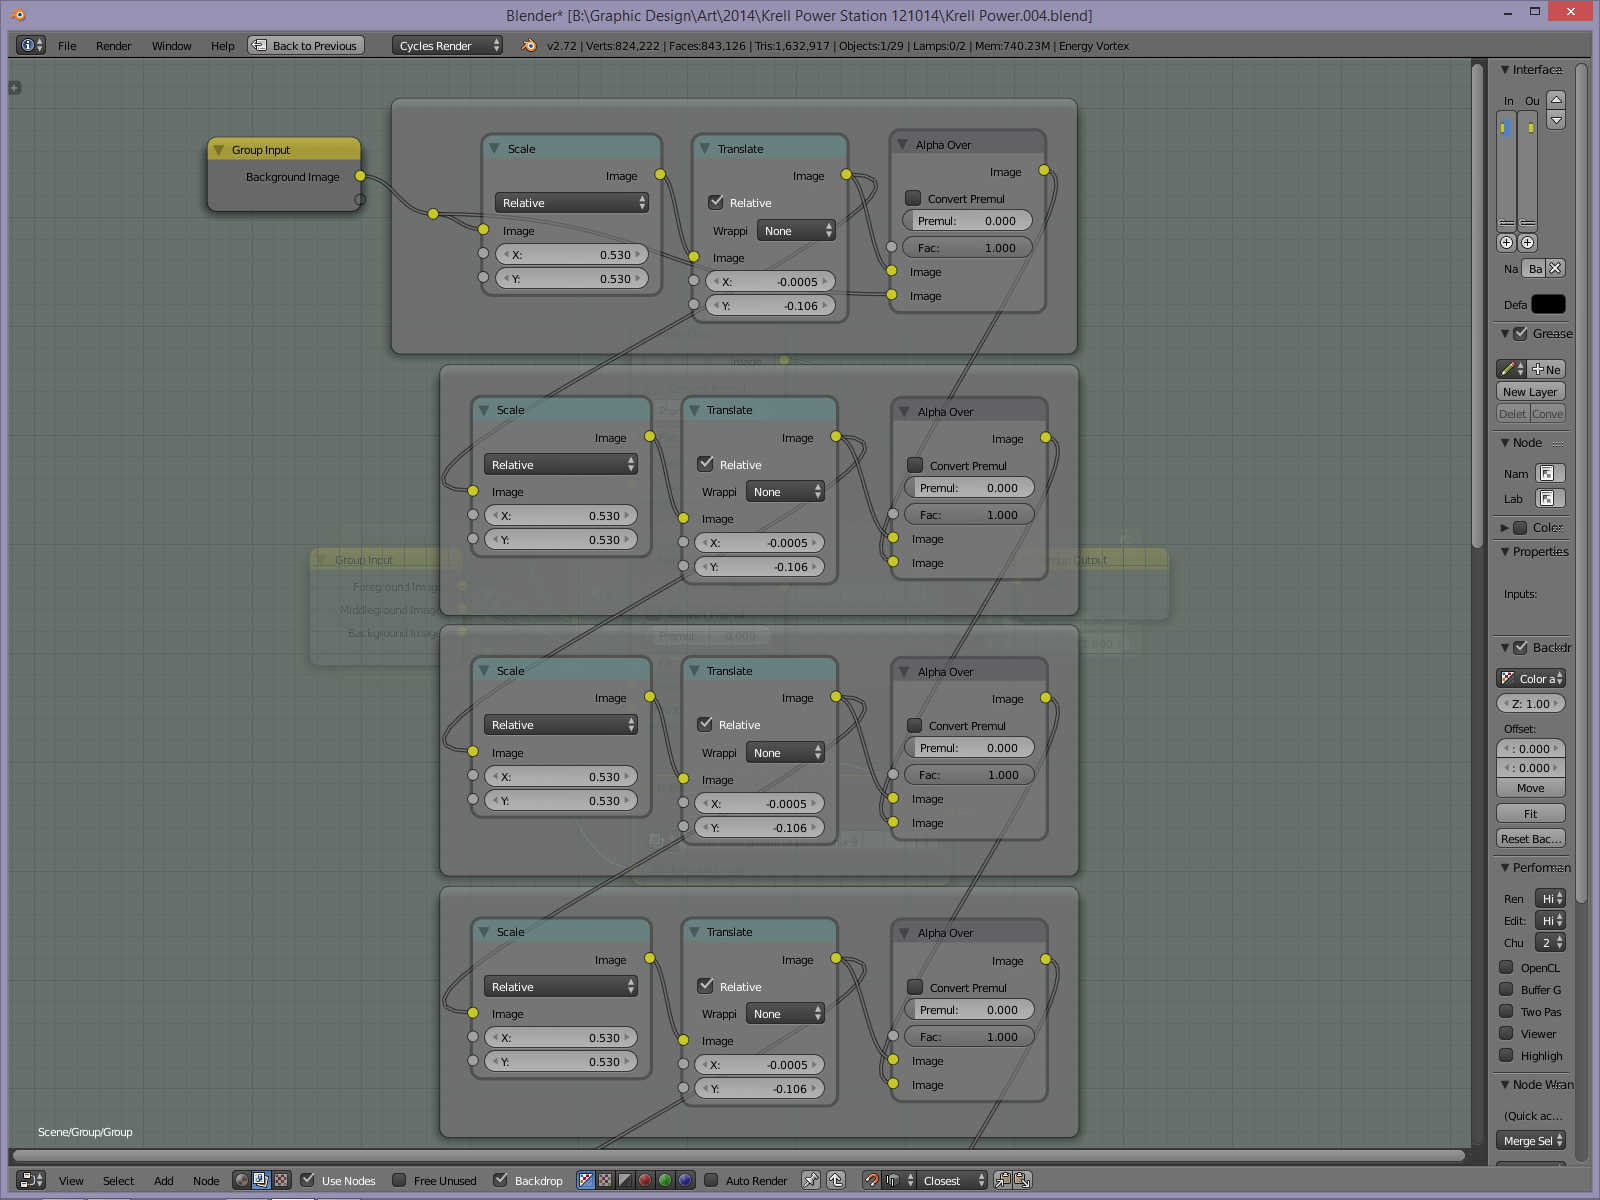
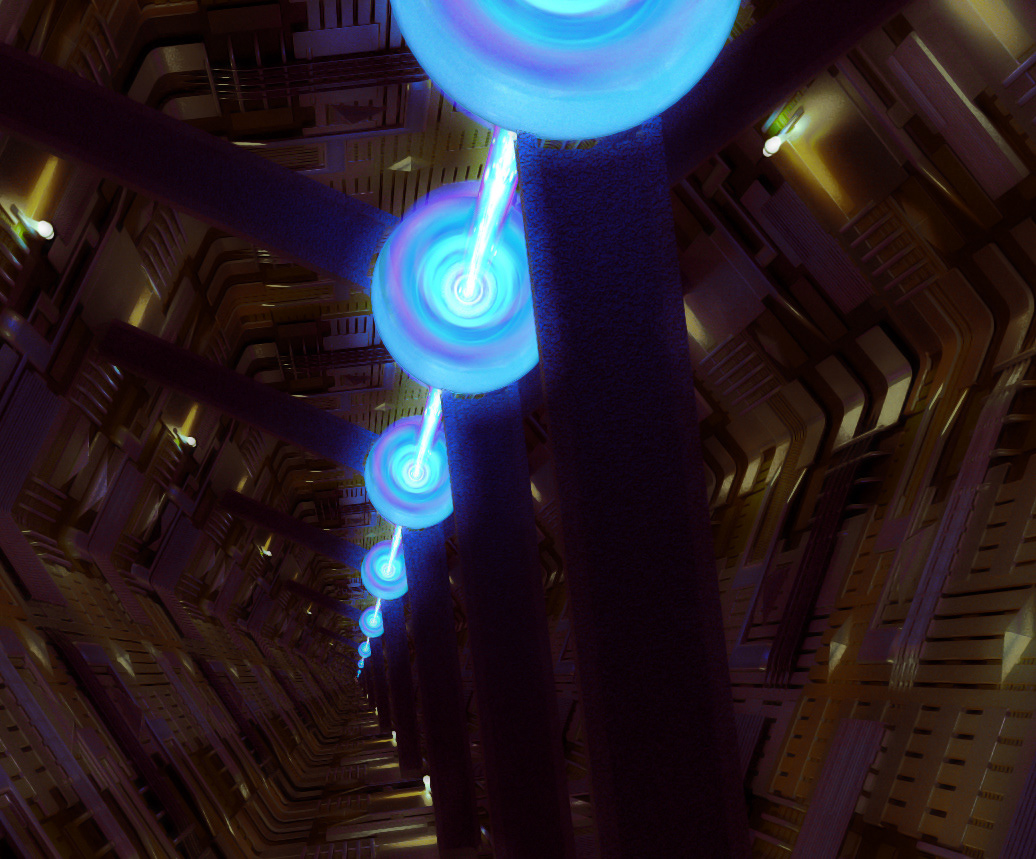
This is part homage to one of my favorite movies and part exercise to learn a few more Blender techniques. The main technique I was trying was how to render a problematic scene in three sections (foreground, middleground, and background) and have Blender put them all together. At the same time, I also used the compositor to take the background render and duplicate it to make the tunnel appear far longer/deeper than I had modeled it.
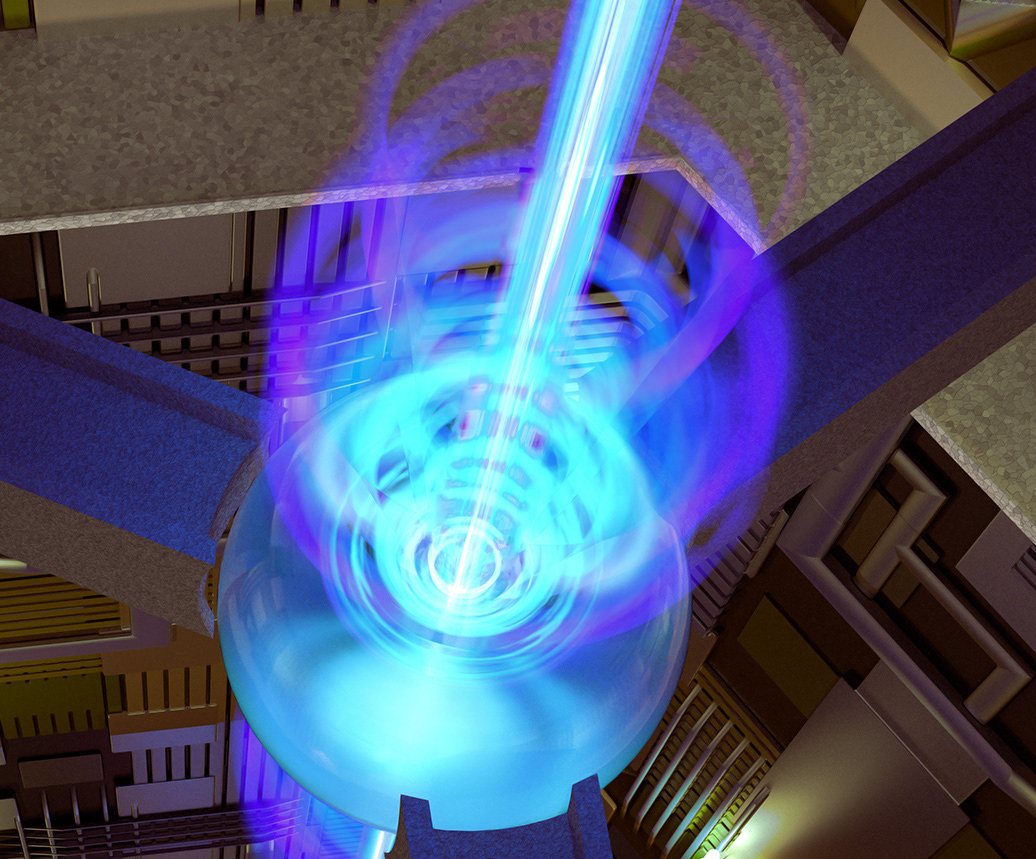
The secondary effect I am trying out is the energy beam. That was created in Blender, too. For you Blender heads out there, it's a procedural emission texture, applied through the Volume socket (I did not realize you could apply an emission node that way). The vortices of light were created using the same basic method.
In Photoshop, I just did some color and tonal adjustments, and cleaned up a few spots that seemed to trip up Blender's compositor.
This scene was inspired by a scene from the movie - it has similar elements, though not exactly alike. Can you name the movie? Hint: it is an old one.
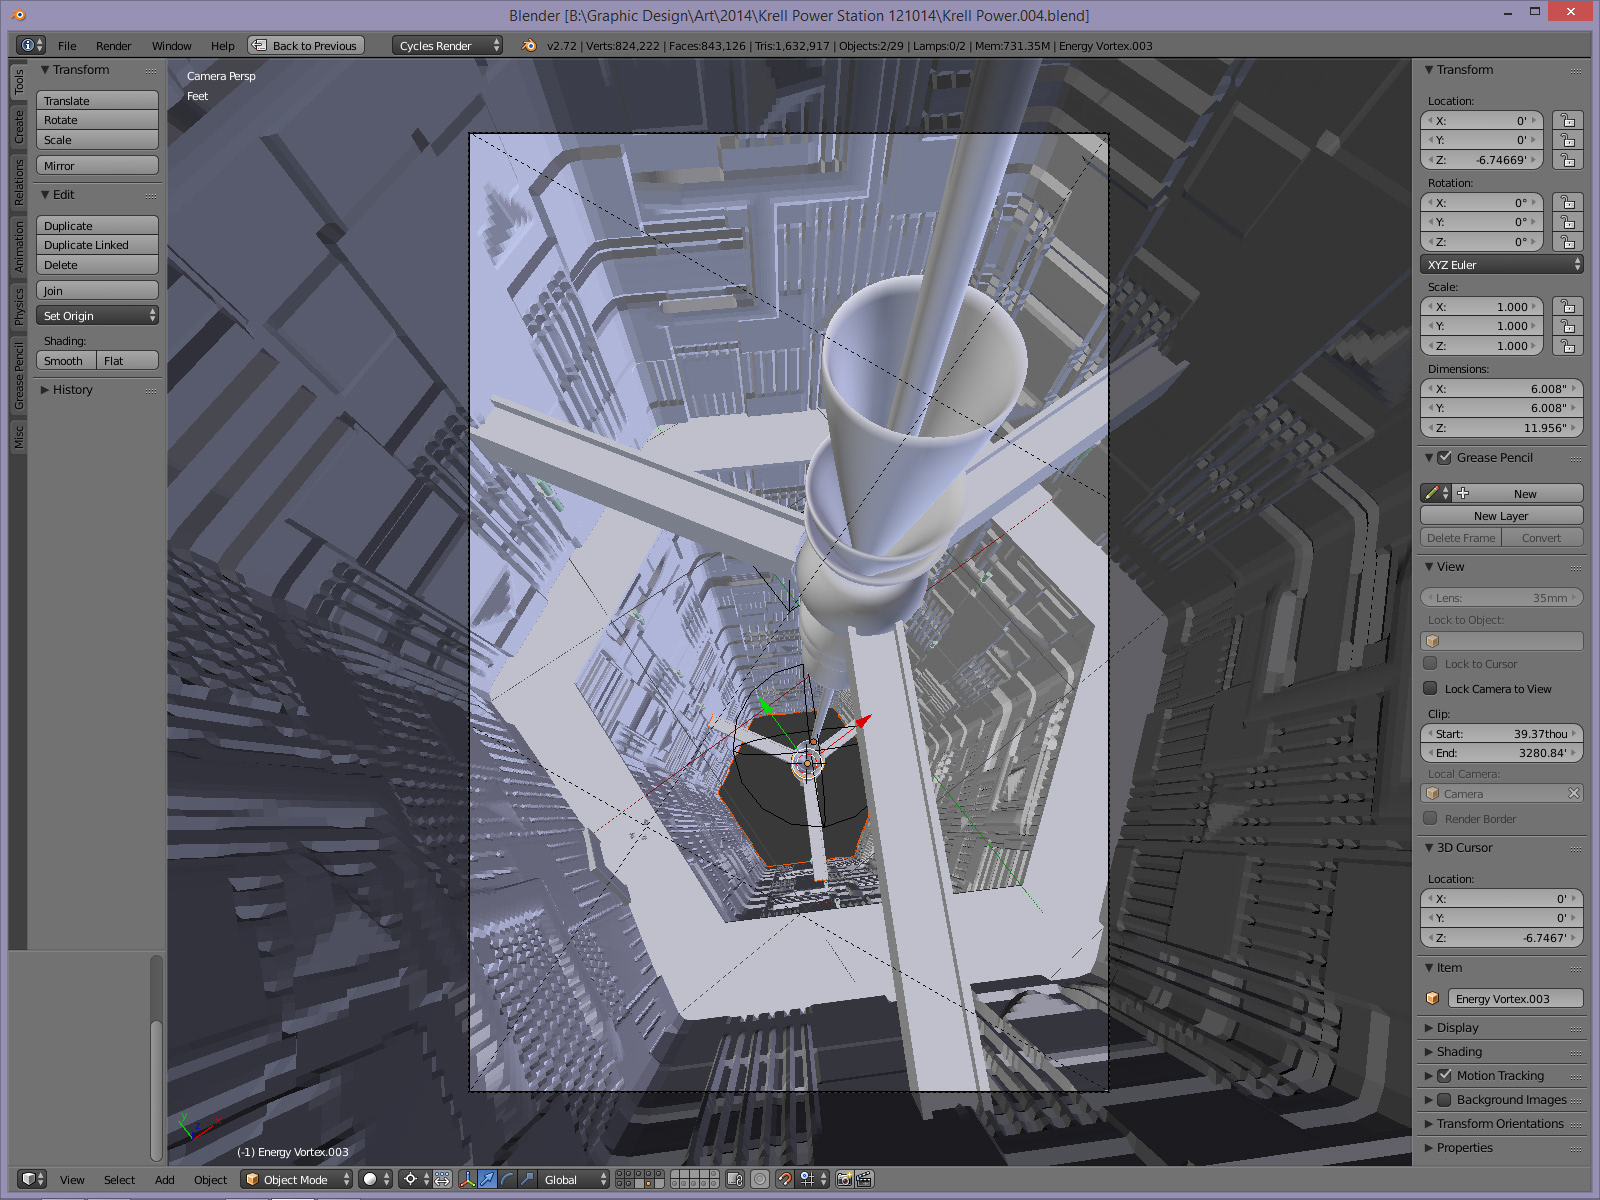
Here is the scene setup in Blender. It is actually divided (in layers, that is) into three render stages: Foreground, which goes down to the gangway, Middleground and Background. Each set was rendered by itself, then put together in the compositor. The Background render was duplicated in Blender's compositor to create the additional depth of the shaft (see below).
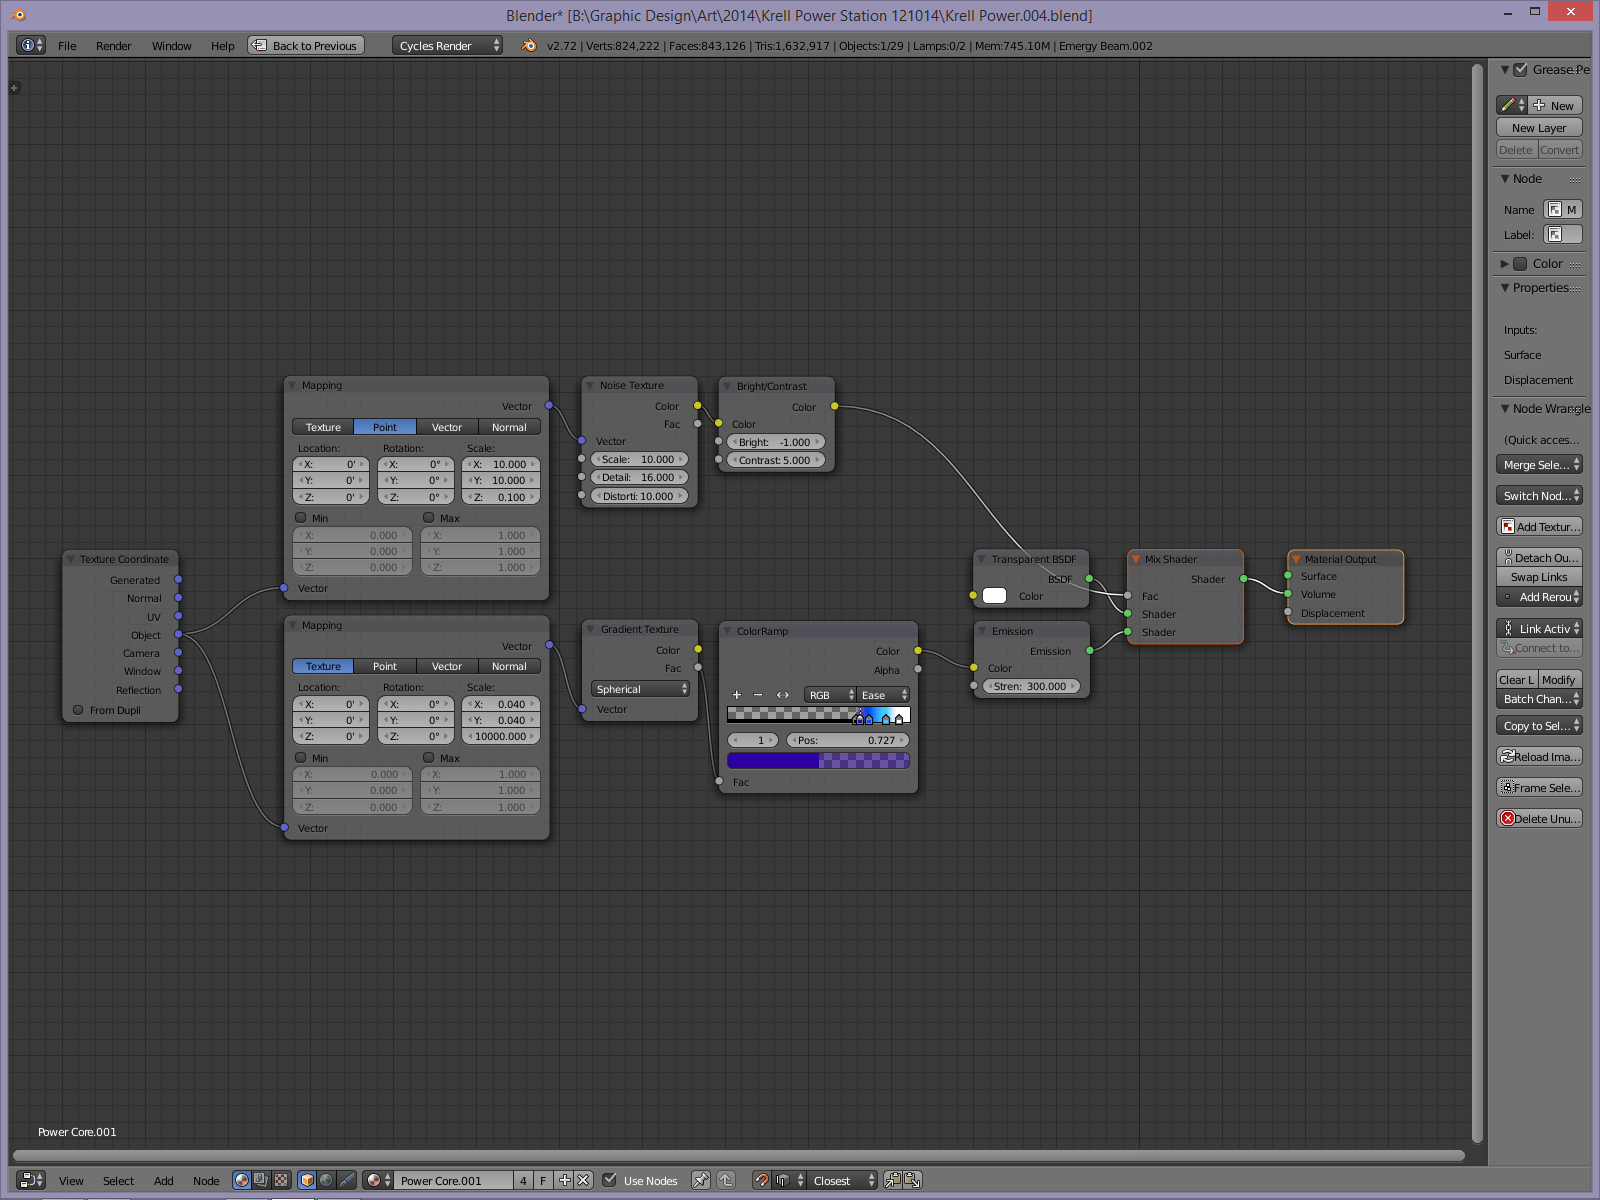
Here is the material setup for the central energy beam. I'm sure other people already knew you could plug an Emission node into the Volume socket, but it was new for me. Not sure I could have achieved the same effect otherwise - certainly not with my current level of knowledge.
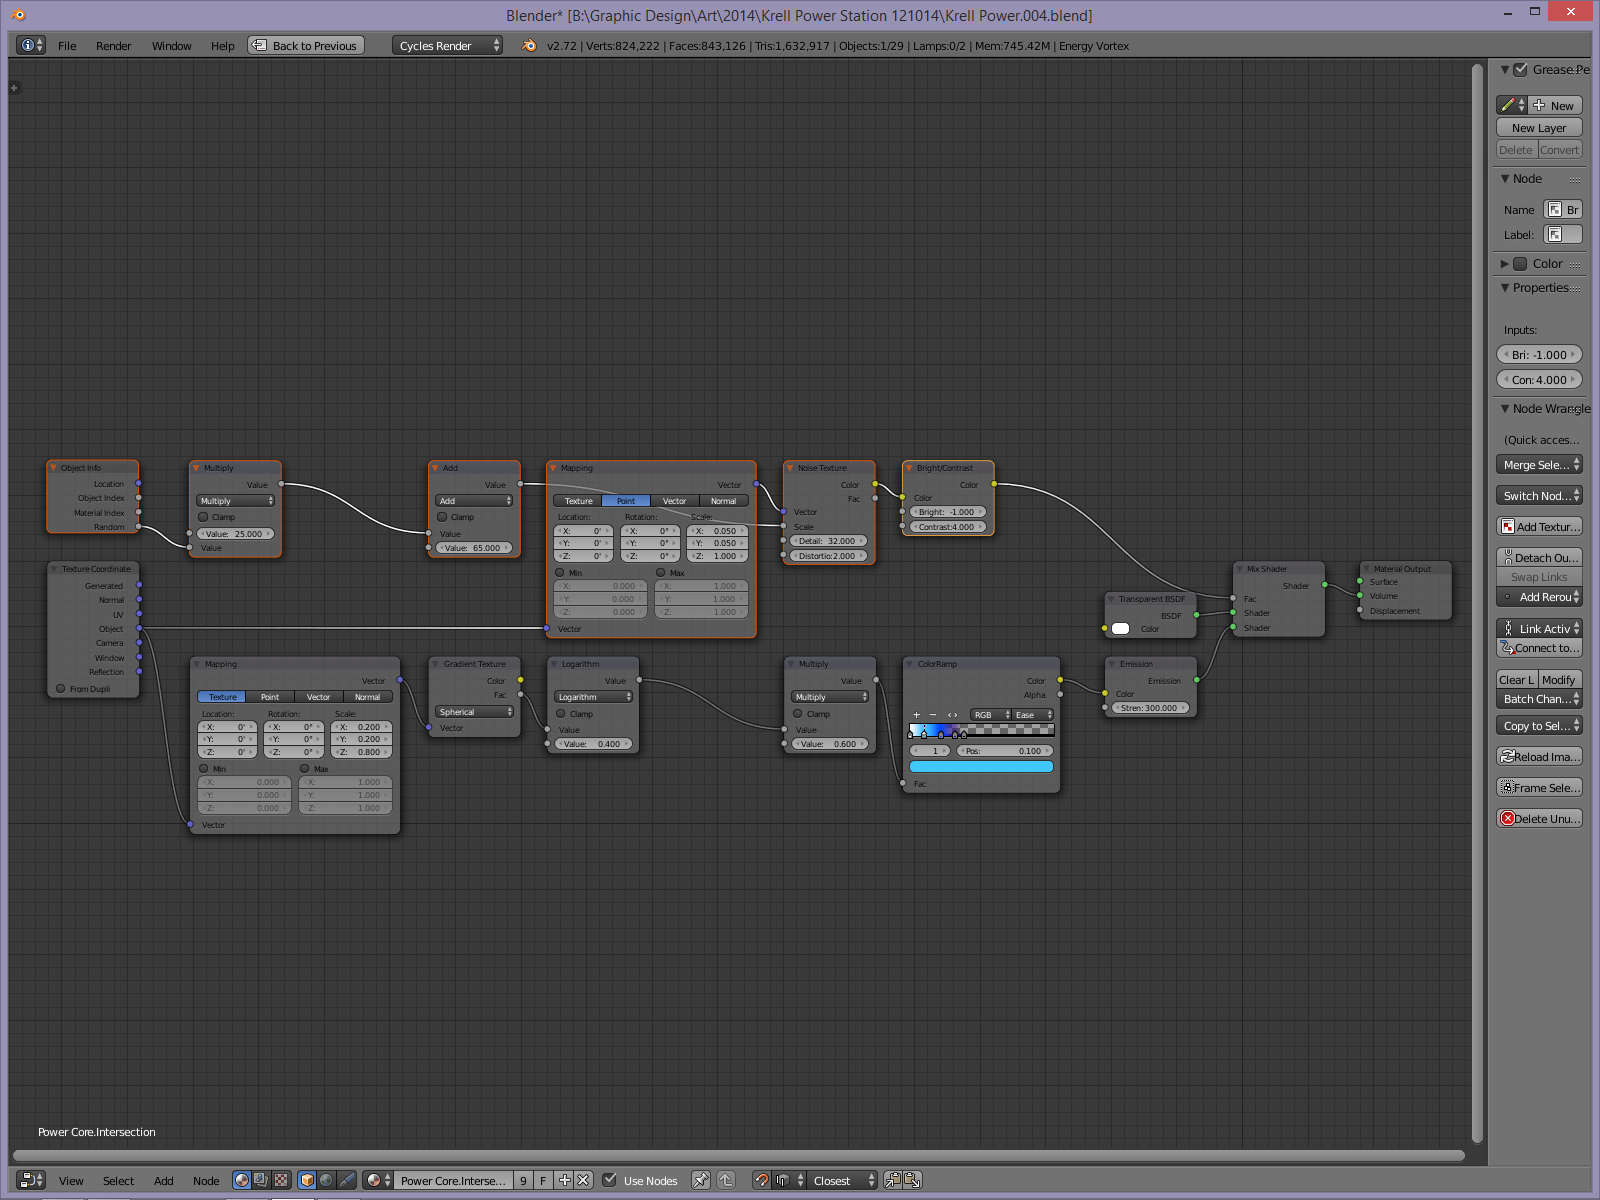
This is the setup for the vortices that go around the energy beam, where it meets the glass lenses. Basically, it is the same setup as the energy beam, but with some additional tweaks.
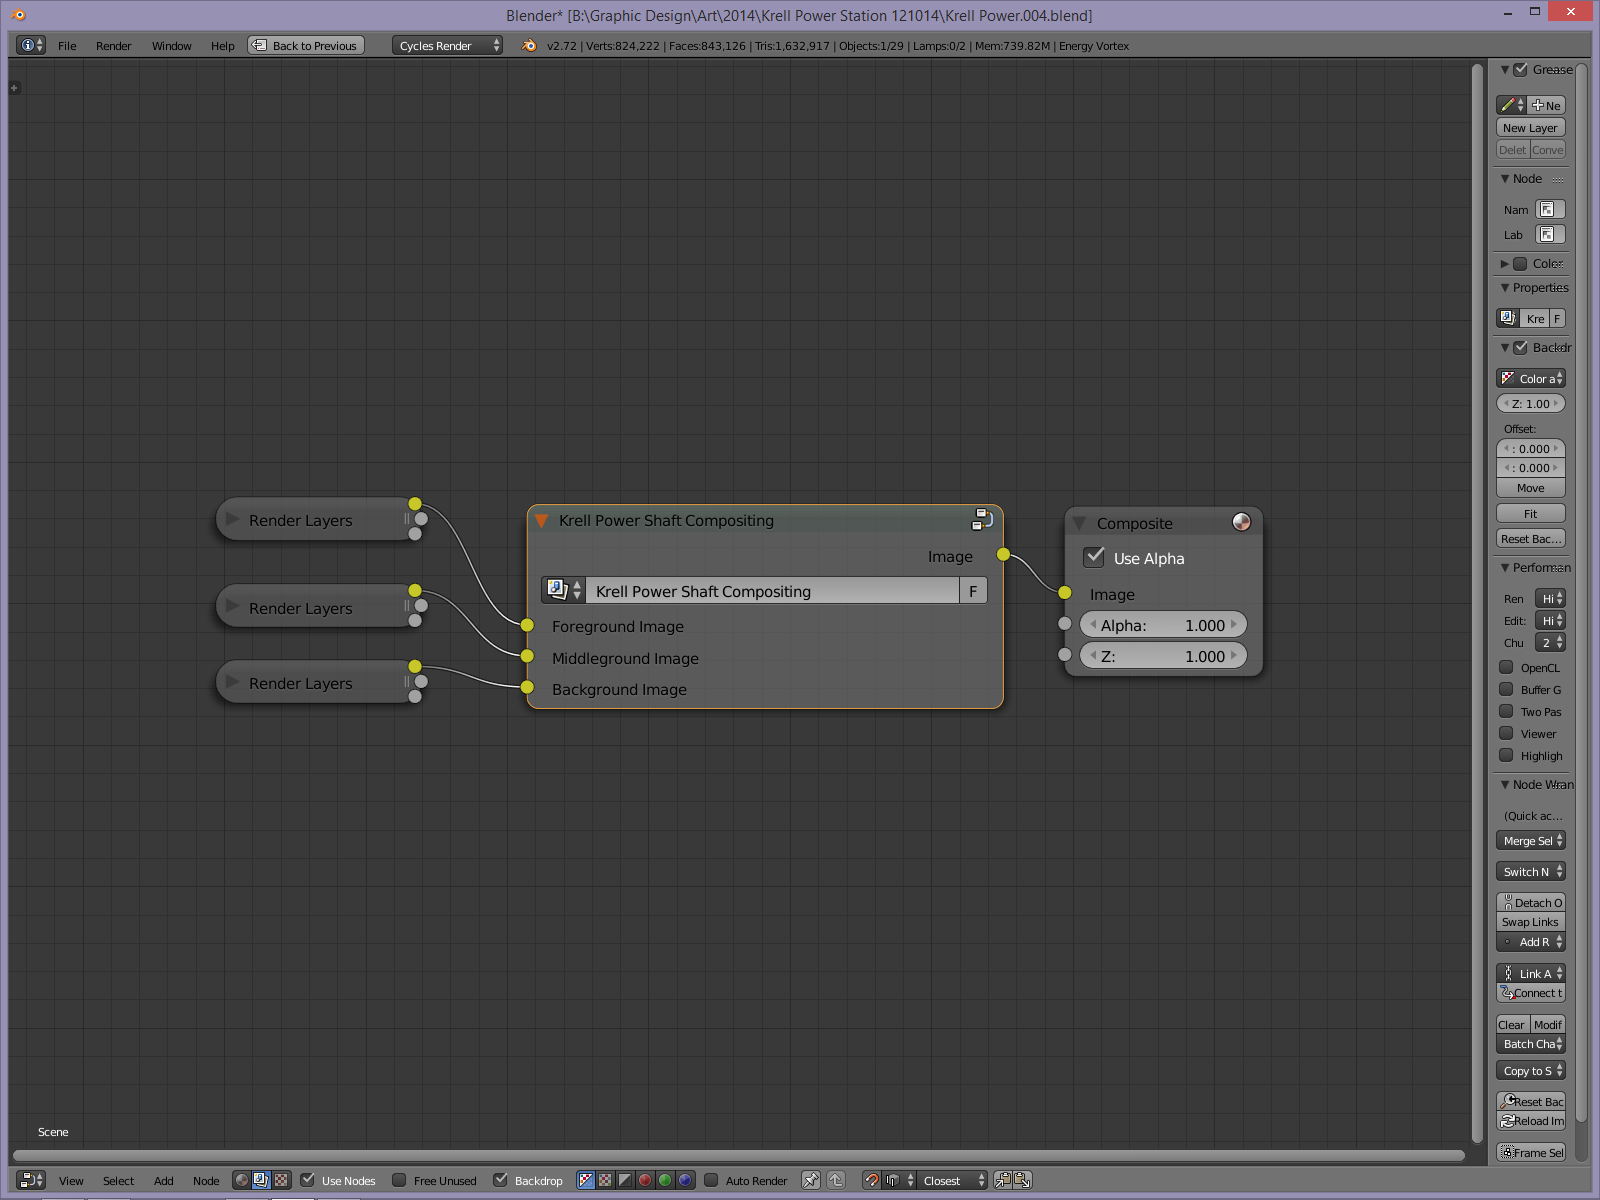
I've never run multiple renders and used the compositor to put them together like this. After a bit of trial and error, this is the structure that finally worked for this image. The breakdown follows...
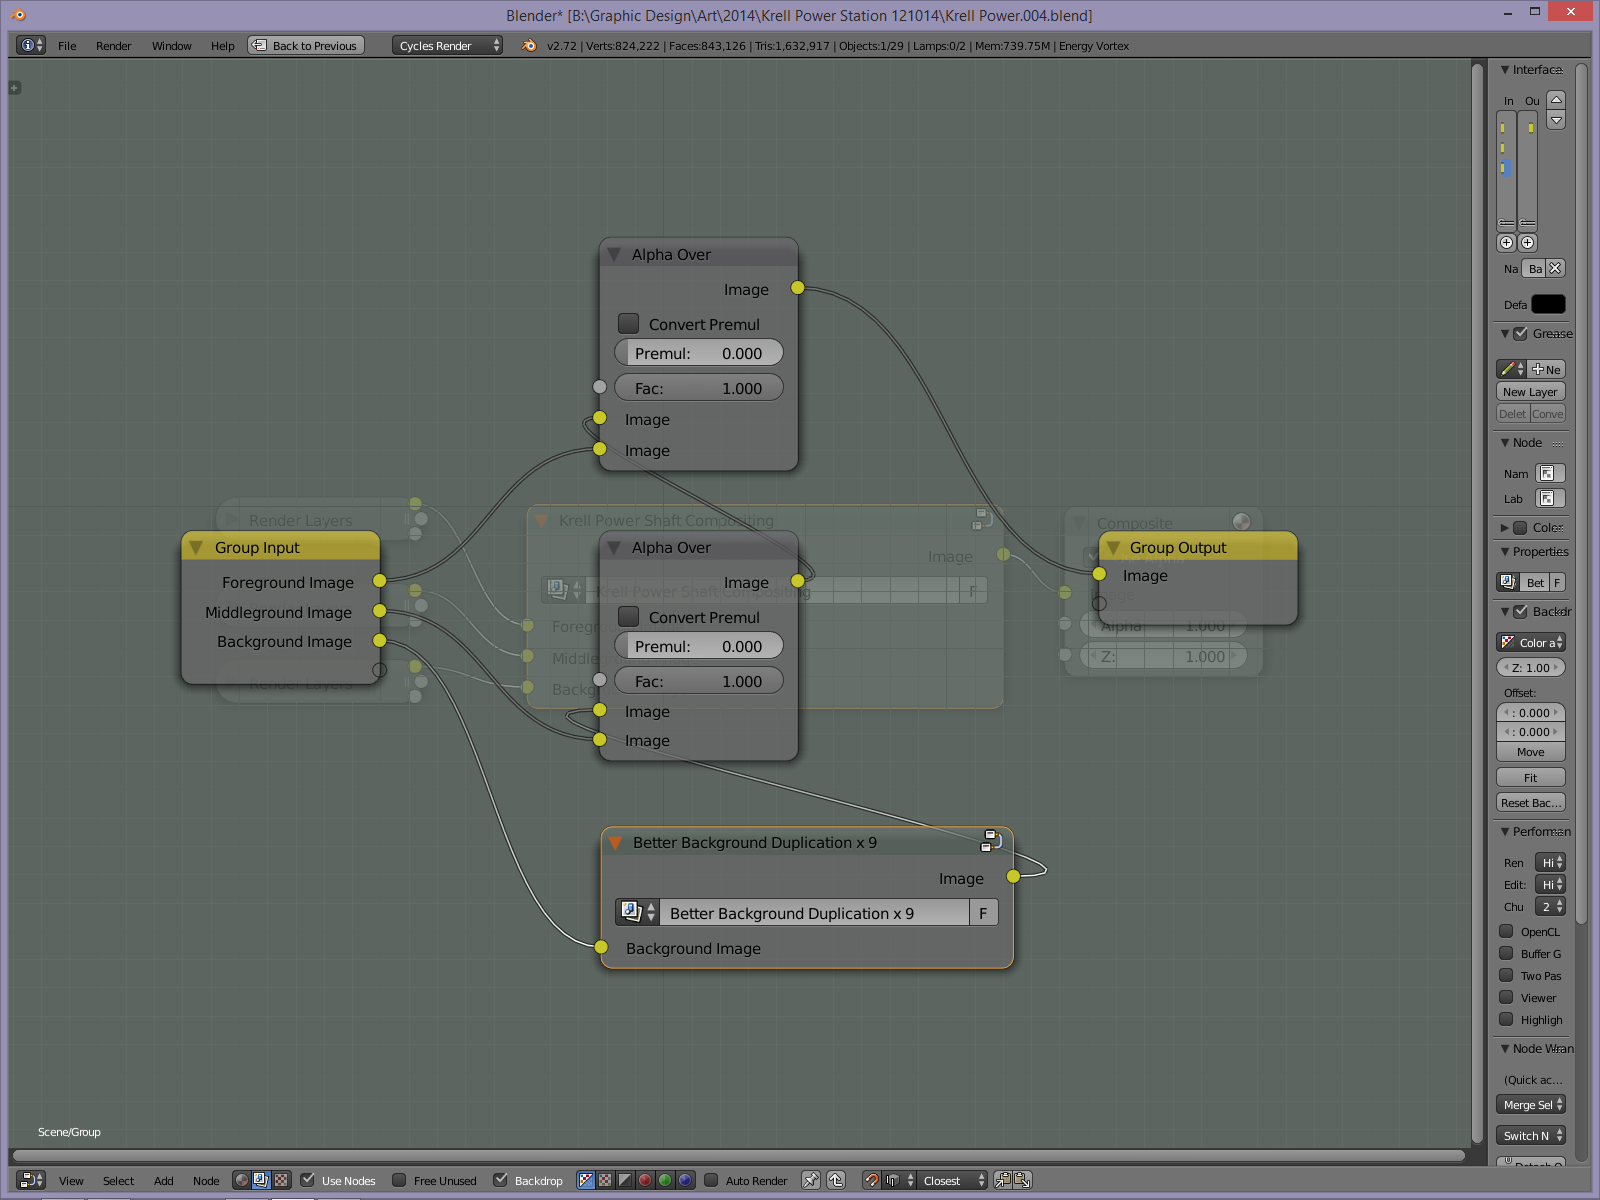
Hello, Alpha Over - my new friend.
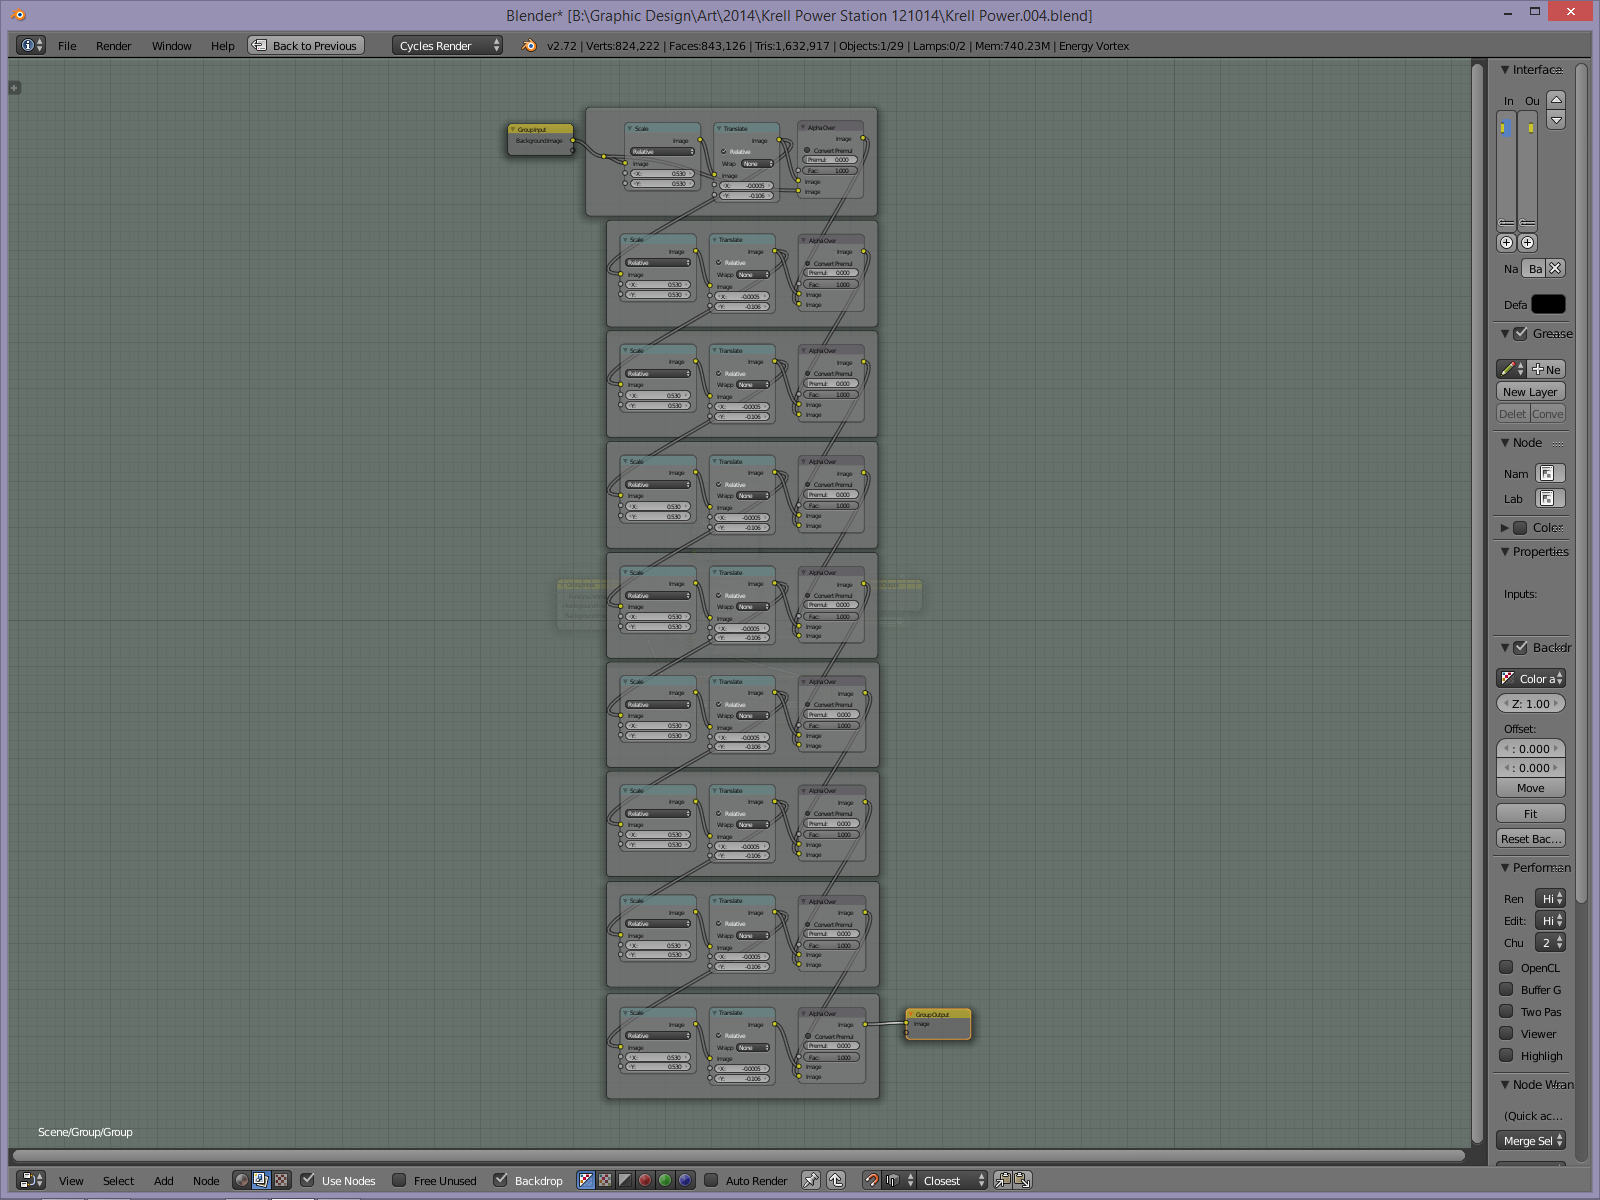
Since building out the entire shaft was not viable (kept crashing the render), even with arrays, this was the solution. Take the Background render, scale it, translate/move it, and add it to the stack. Then take the scaled & translated and do it again. Lather, rinse, repeat.
Here it is up close.
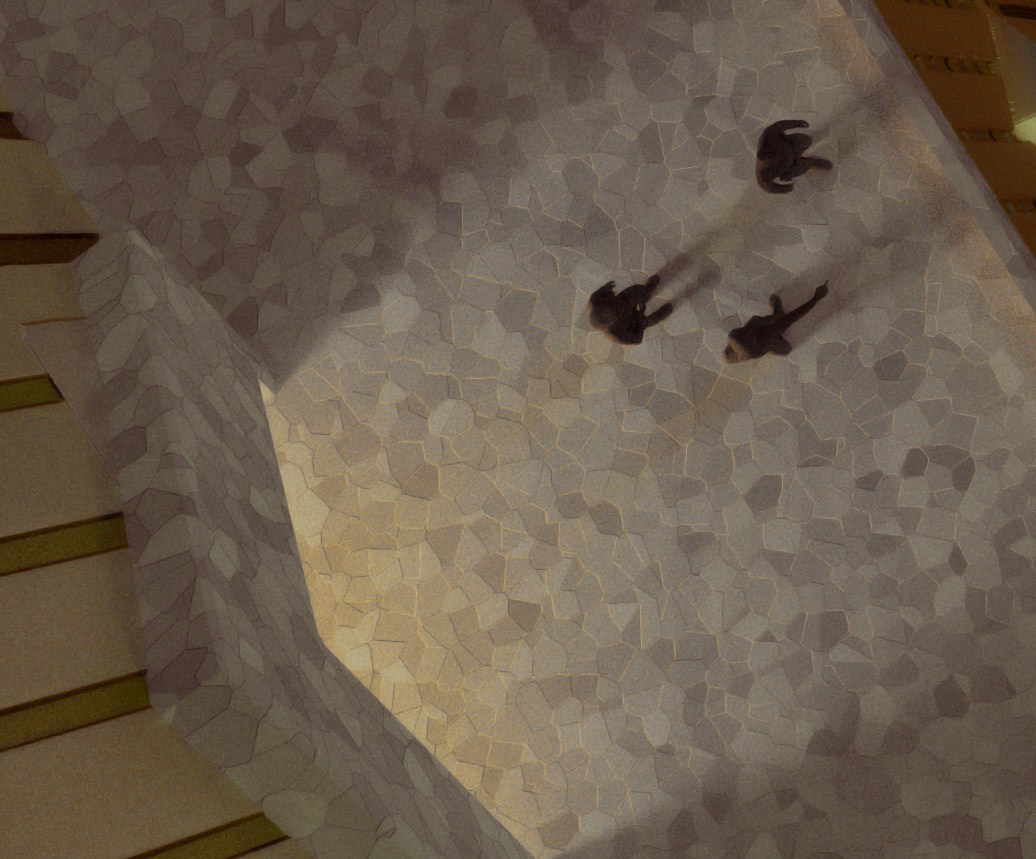
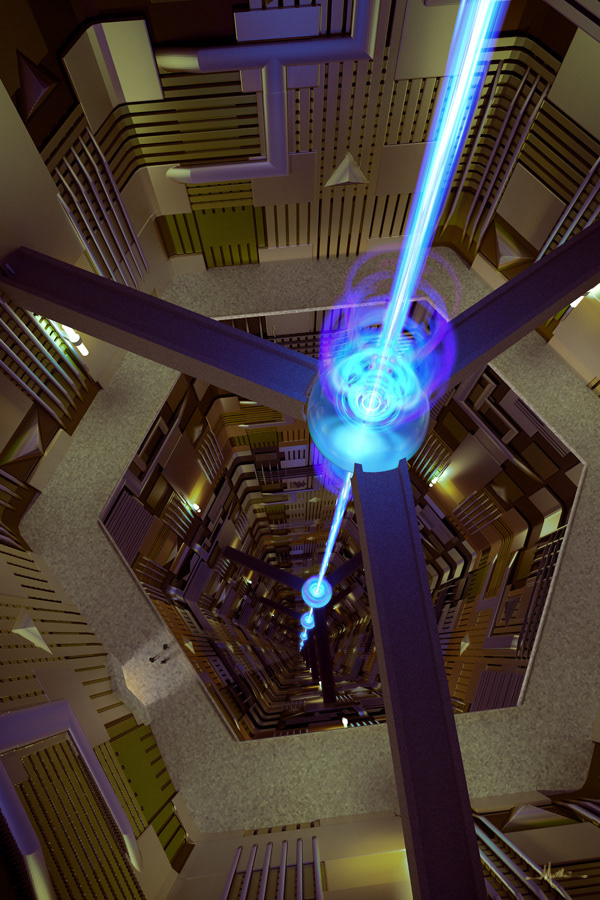
Here is a detail shot of the render, after post production.
Another detail shot.
Love that vortex effect!
You may also like
tiny expanse
December 21, 2013
Tree
May 16, 2014
Dried Flowers [set of 4]
June 28, 2014
The Introverts' Kegger
May 29, 2014
Hell Freezes Over
February 05, 2011
Swarm - Illustration Friday
February 28, 2011
roughly homogeneous
June 04, 2014
slither
January 24, 2011
glass wave
April 20, 2014
Repetition, repetition, repetition...
January 07, 2011